Colorbond fencing has gained enormous appeal in recent years, not just because of its visual appeal but likewise for its durability and low upkeep. If you're a beginner seeking to install a Colorbond fence, this comprehensive guide will stroll you through every step of the process-- from the preliminary planning phases to the last touches.
A Comprehensive Guide to Colorbond Fence Setup for Beginners
Installing a Colorbond fence can be an amazing do it yourself job or a professional endeavor that improves your residential or commercial property's value while providing security and privacy. This guide aims to equip you with whatever you require to know about Colorbond fencing, consisting of colors, profiles, setup time, advantages, maintenance ideas, and whether you must take the DIY path or hire professionals.
Understanding Colorbond Fencing
What is Colorbond Fencing?
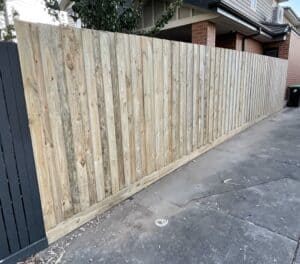
Colorbond fencing refers to a steel-based fence system covered with a baked-on enamel paint finish. This covering offers superior protection against weather elements and rust. The result is a lasting and attractive fencing option.
Colors Readily available in Colorbond Fencing
Colorbond provides a substantial scheme of colors-- over 14 shades-- allowing homeowners to pick designs that complement their architecture and landscaping. Some popular choices consist of:
- Classic Cream Woodland Grey Ironstone Dune
With such variety, it's simple to discover a color that fits your aesthetic vision!
Profiles: Picking the Right Style
The profiles of Colorbond fencing determine how the panels are designed and set up. Here are some common profiles you may consider:
- Flat Leading: Uses a clean and modern-day look. Pale Eaves: Provides a stylish touch. Raked Panels: Suitable for sloping terrains.
Each profile has its special charm and functionality.
Benefits of Installing a Colorbond Fence
Durability That Lasts
One of the main benefits of Colorbond fencing is its exceptional sturdiness. Unlike timber fences that can rot or warp in time, Colorbond fences withstand termites and other pests.
Low Maintenance Requirement
Maintaining your Colorbond fence is as basic as periodic cleaning with water or moderate soap. You will not have to worry about sanding or repainting often like conventional wood fences.
Versatile Style Options
With numerous colors and profiles readily available, it's easy to customize your fence according to your design preferences.
Eco-Friendly Choice
Colorbond items are made from recyclable products, making them an ecologically responsible option for homeowners.
Preparing for Your Fence Installation Project
Assessing Your Home Needs
Before diving into installation, assess what type of fence fulfills your needs. Consider factors like personal privacy levels required, design aesthetics, regional council policies, and residential or commercial property lines.
Gathering Essential Tools & Materials
Here's a list of tools you'll require for installing your Colorbond fence:
Measuring tape Level Post hole digger Hammer ScrewdriverAnd don't forget the important materials:
- Colorbond panels Steel posts Concrete mix (for securing posts)
DIY vs Expert Setup: What's Best for You?
Advantages of do it yourself Installation
If you're handy in your home improvement tasks, handling this project yourself can conserve cash on labor expenses while giving you a sense of accomplishment as soon as completed.
When to Work with Professionals?
While DIY tasks can be rewarding, some situations warrant hiring professionals:
Complex designs Large homes needing comprehensive work Limited experience with similar projectsConsider all factors thoroughly before choosing which route matches you best!
Step-by-Step Guide to Setting up Your Colorbond Fence
Step 1: Preparation Your Layout
First things initially-- plan where your fence will go! Step the lengths needed accurately so you understand how many panels will be required.
Tip: Mark the design using stakes and string; this visual guide will help keep whatever directly during installation.
Step 2: Setting Up Posts
Dig holes for your steel posts at intervals specified by your selected panel length (usually around 2-3 meters apart).
Post Hole Depth
The depth should normally be about one-third of the post height above ground level for stability.
Step 3: Placing Concrete Mix in Holes
Once holes are dug, put the posts in their respective holes before putting concrete around them to protect them strongly in place.
Setting Time
Allow concrete enough time (generally 24 hr) to set before proceeding further.

Step 4: Connecting Panels
After posts are established firmly:
Align each panel in between 2 surrounding posts. Secure them utilizing suitable screws or fasteners advised by the manufacturer.Step 5: Final Touches & Cleansing Up
Finally, inspect your work! Guarantee everything is lined up effectively before cleaning up any debris left over from installation.
Maintaining Your Colorbond Fence: Tips & Tricks
Although low-maintenance, regular maintenance extends its life expectancy significantly:
Clean with water regularly. Check for indications of rust or scratches; retouch as necessary. Trim back foliage that could rub against panels over time.By following these basic actions along with seasonal inspections every couple of months will keep your fence looking fresh!
FAQs about Colorbond Fence Installation
Q1: How long does it require to install a Colorbond fence?
A1: Typically between one day to several days depending on intricacy and length-- time varies based on do it yourself versus professional work too!
Q2: Can I set up a Colorbond fence myself?
A2: Yes! Lots of homeowners effectively install their own fences if they feel comfy doing so after thorough research.
Q3: Do I require council approval for my fence?
A3: Laws differ by place; check local council guidelines in advance regarding height restrictions or allows needed!
Q4: Are there service warranties available on Colorbond products?
A4: Yes! A lot of makers use guarantees varying from 10 years upwards depending upon particular products utilized during installation.
Q5: Can I paint my existing wooden fence with color bond paint?
A5: While possible-- it's usually recommended changing old timber fencing rather than attempting painting due concerns over adhesion longevity concerns down line!
Q6: What if I desire more personal privacy? Can I include extra height?
A6: Before adding height consult local policies as there may be restrictions regarding maximum allowable heights in domestic areas!
Conclusion
In conclusion, starting the journey of setting up a Colorbond fence can be extremely gratifying whether you select the DIY route or employ expert assistance! Comprehending colors and profiles keeps it trendy while keeping performance-- offering security without compromising looks!
Now that you have actually read this extensive guide customized particularly for newbies like yourself-- you're equipped https://parapetfencing.com.au/ with all vital knowledge required moving forward! Remember-- the key lies not only in selecting products wisely but also guaranteeing appropriate upkeep practices afterward keep whatever looking pristine gradually! Pleased fencing!